How To Customize your Quick Access Toolbar
In this tutorial you will learn a shortcut to create your presentations faster by setting up a Quick Access Toolbar. This feature is available in PowerPoint 2010 and 2013.
You need to use a number of tools in PowerPoint to create graphics, insert audio, review slides etc. while creating a business presentation. These tools are usually distributed over a number of tabs on the PowerPoint ribbon. Even inside the tabs, sometimes they are hidden inside a pop up menu or drop down menu. Some commands may not even be on the PowerPoint ribbon. You may have to unearth them from the backstage (from PowerPoint options).

A presenter therefore wastes more time searching for the commands than creating slides. PowerPoint 2010 version onwards you have the option to create your own tab and populate it with all the commands you use commonly. This really saves a lot of time.
However, there is another useful time saving option in PowerPoint that allows you to access your commonly used commands even more quickly. The option is to customize your quick access toolbar.
What is Quick Access Toolbar?
It is the bar with a row of commands like Save, Undo etc. placed above or below the PowerPoint ribbon as shown in the following visual:
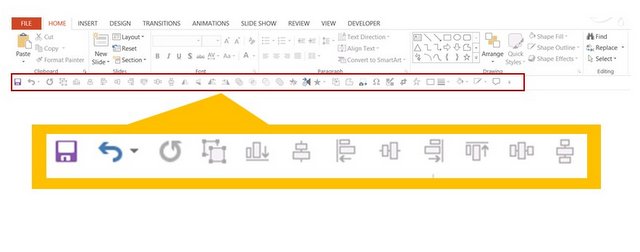 Preview of A Quick Access Toolbar
You can add more commands to the bar for immediate access. The toolbar will be available for access no matter which tab you activate.
Save time by cutting down the steps to access a command:
Let us say, you want to access a command called ‘Distribute Horizontally’. The path to the command is –
- Go to ‘Home’ tab
- Click on Arrange
- Go to Align
- Select ‘Distribute horizontally’ from the pull out menu
When you have the command placed on your quick access toolbar. You can access the command on a single click.
Steps to customize the Toolbar:
Right click anywhere on the PowerPoint ribbon. A pop up menu appears:
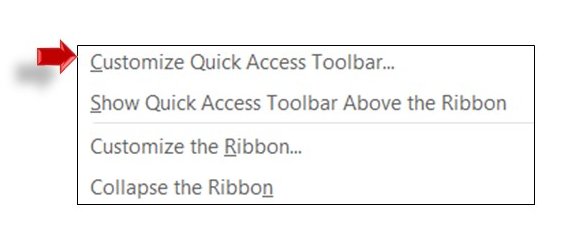
Click on the ‘Customize Quick Access Toolbar’ option. The following dialog box opens up:
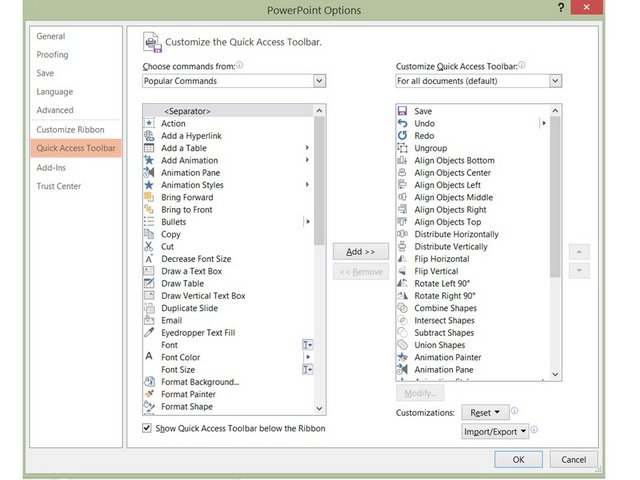 Quick Access Toolbar Options
The box has a list of commands on the left slide and the tools included in the Quick Access Toolbar on the right. To add more tools to the toolbar, you just need to choose the command on the left and click on the ‘Add’ button. The same way, if you want to remove any of the commands from the toolbar, press ‘Remove’ after selecting the command.
Accessing more commands:
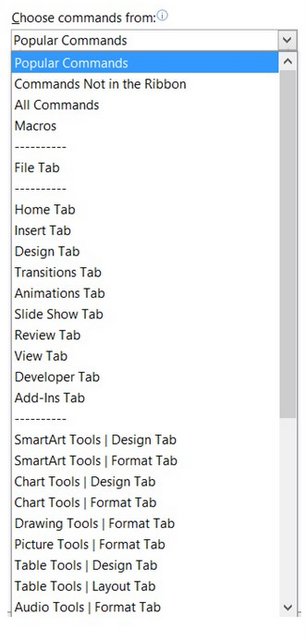
The option under ‘Choose commands from:’ pick list is set to ‘Popular commands’ by default. When you click on the drop down arrow, you can access more commands from ‘Commands not in the ribbon’ or ‘All Commands’. You can also pick commands from specific tabs if you choose to:
Reorder the commands:
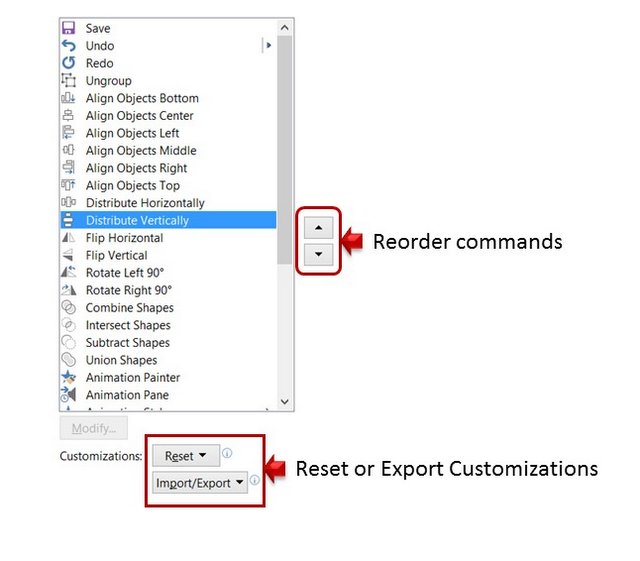
Once you include all the commands you need, you can reorder their position using up/down arrow to the right of the pane.
Reset or export customizations:
In case you are not happy with the customization, you can reset it. If you want to use the Quick Access Toolbar customization on other computers, you can export the customization as a file and import it onto your other computer using a USB drive or SkyDrive.
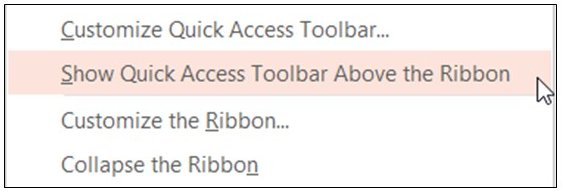
You can place the Quick Access Toolbar above or below the ribbon by right clicking on the PowerPoint ribbon and choosing the relevant option:
That is all the things you can do to customize this toolbar and save time in creating presentations. I hope you found this tutorial useful. You can find many more such useful PowerPoint tricks in our tutorials section.
Please do share your comments below if you found this tutorial useful.
Related Posts
Top of Page : Quick Access Toobar
Main PowerPoint Tutorials Page
