5 Tips for Alignment in PowerPoint
In this article you will learn the importance of align tool and get 5 tips for alignment in PowerPoint.
Importance of Alignment in PowerPoint
Take a look at the following. Do you see a relationship between the shapes here?
 Shape Alignment Issue
Though the colors of the rectangles are different, it appears as if the aqua, orange and blue rectangles are at the same level and are subordinate to green and purple rectangles. The reason is – subconsciously we tend to relate items that are aligned together. That is why alignment of objects on a slide is quite critical.
When you align items on your slides carefully, you not only make your slides look professional, but also make the relationship between the items clear. In this article, you will find 5 useful tips regarding aligning of objects in PowerPoint.
Tip 1: Always use the ‘Align’ tool
Though this sounds quite basic, it is surprising to see the number of presenters who align items using just the eyeball judgment. This usually gives quite an unprofessional look to your slides especially when you project your slides on a screen. Even small errors in alignment tend to get magnified when you see a slide in full view.
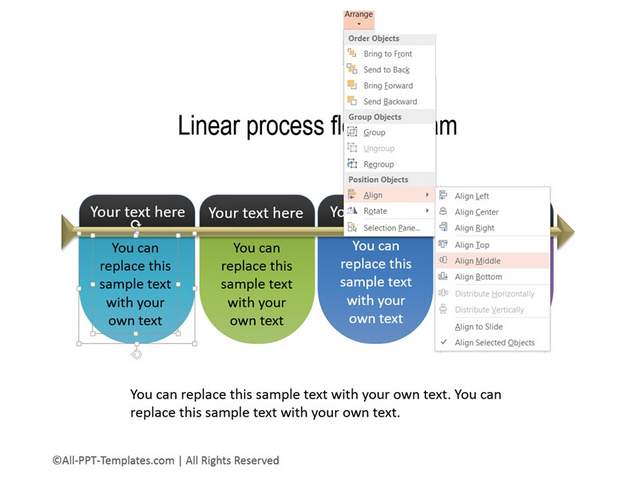
Here is a screenshot of the options available for alignment:
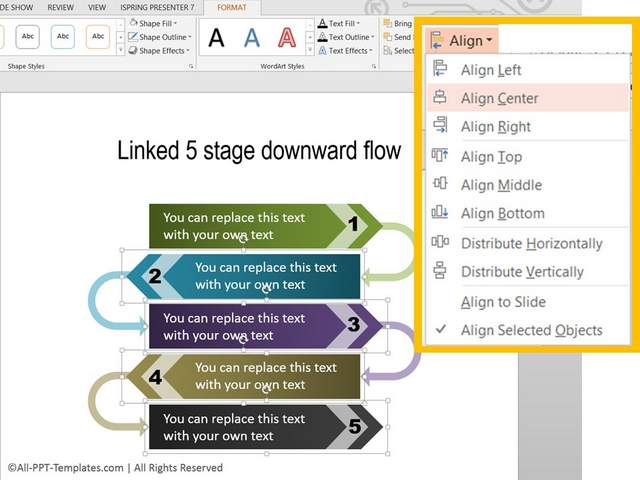 Align Options ( Source for slide: PowerPoint Infographics Pack)
Use the Align tool in PowerPoint or take advantage of features like Smart Guides in PowerPoint 2013 to align items on your slide.
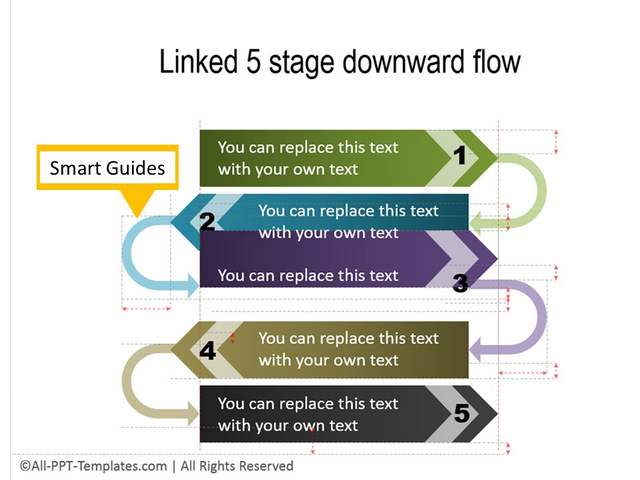 The dotted red lines are Smart Guides
Tip 2: Align dissimilar shapes centrally
It is always a good idea to align dissimilar shapes centrally than to align them to the left or right. Visually, the alignment looks better balanced as shown below:
Tip 3: Aligning layers correctly
To align layered items or two items exactly one on top of the other, select both the items and use ‘Align left’ and ‘Align Top’ options one after another. The other way to do this is to align items by snapping them to grid.
In the sample slide below you can see the text box and the colored shape behind being aligned properly.
 Aligning 2 layered shapes ( Source of slide: PowerPoint Infographics Pack)
Quick Note: The templates shown in the screenshots above are taken from the 600+ PowerPoint Infographics Pack- a pack with 600+ editable PowerPoint graphics for presenting data and information your business slides. Learn more and browse the infographics here.
All the infographics templates in our collection are fully editable. Just choose the template that matches your thought and replace the sample text with your own text. Your business slides get ready in no time. Creating professional quality business slides has never been easier.
Tip 4: Align after Ungrouping Objects
Sometimes you may group a shape and the associated label together. When you align by selecting the grouped and ungrouped objects together, you may find some uncomfortable gaps in alignment as shown below:
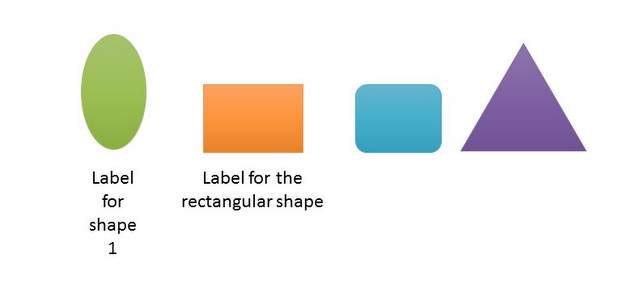 Issue with aligning grouped objects
A better way to approach this is to ungroup objects, adjust the label sizes, group again and then align items.
Tip 5: Place the Align tools in your Quick Access Toolbar
For some strange reason, align tools are hidden below three levels in the PowerPoint ribbon. So, you waste a lot of time by accessing the tools from the ribbon each time. A simple way to improve your productivity is to stick all the alignment tools to your quick access toolbar.
 Align Tools in Quick Access Toolbar
Following the five tips about alignment in PowerPoint is one way to make your slides look professional while saving time.
I hope you found this tutorial useful. You can find many more such PowerPoint tricks in our tutorials section.
Please do share your comments below if you found this tutorial useful.
Related Posts
Top of Page : Alignment in PowerPoint
Main PowerPoint Tutorials Page
